Create Job
After success full creating source, target, stage connections, you are ready to create data migration job.
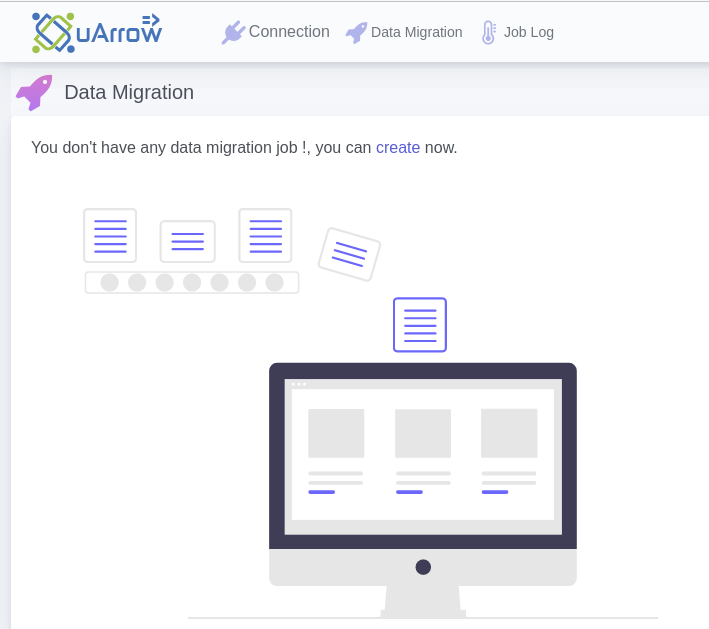
- Click Data Migration menu from top to create data migration job.
- You will be able to see the below screen, there you can click on the create link to create new job.
Note: if you are already created any job you can use + button to create new data migration job.
Select the AWS S3 server connection name from the drop down as the source from which the data files are to be migrated.
Click on the Through System radio button if table names to be migrated are to be selected from the system in the next screen, click on the Through existing File option if the table names to be migrated are to be uploaded via a csv file.
Select the path where the data files are stored as Source File Path; this path should be the parent folder under which the datasets corresponding to the tables should be present.
Fill up the File Format, File Delimiter, Quote Character, Header and Date Format fields using the options from their respective drop down values.
Select the path where the schema files are stored as Source Schema Path.
Click Save followed by the Next button.
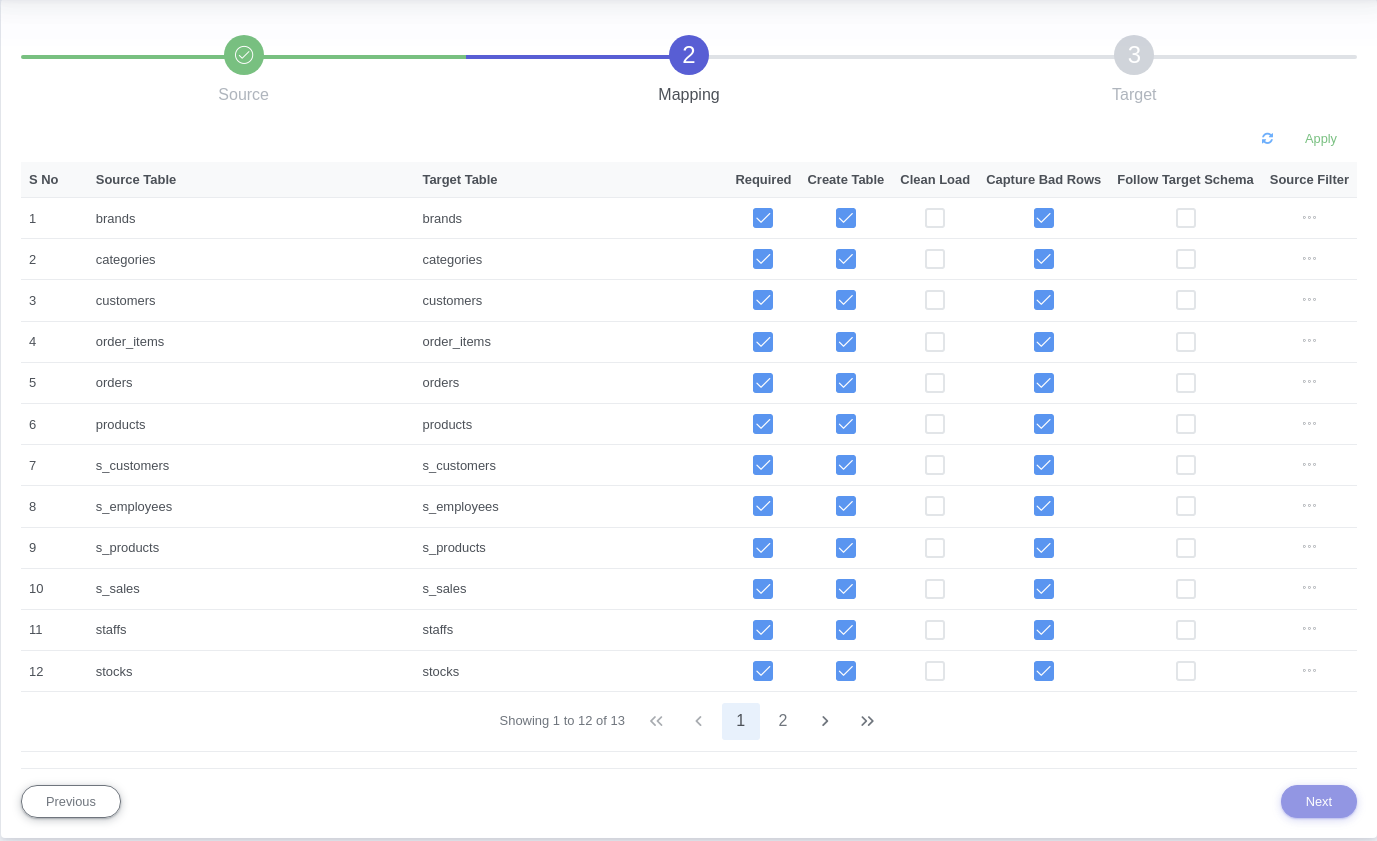
After specifying source details, Save the connection and click Next for mapping defining screen
In the next screen, if the Through System radio button was selected in the previous screen, then a list of data files and table names will pop up. Select/Deselect the Required option for each table as per requirement.
Select/Deselect the Create Table option depending on whether new tables need to be created in Snowflake, similarly select/deselect the Drop table and Follow Target Schema option, depending on requirement.
Select the add filter option if any filter conditions are to be executed on the data files that are to be migrated, write the filter query in the text box provided.
Once done, click on the Apply option, followed by the Next button.
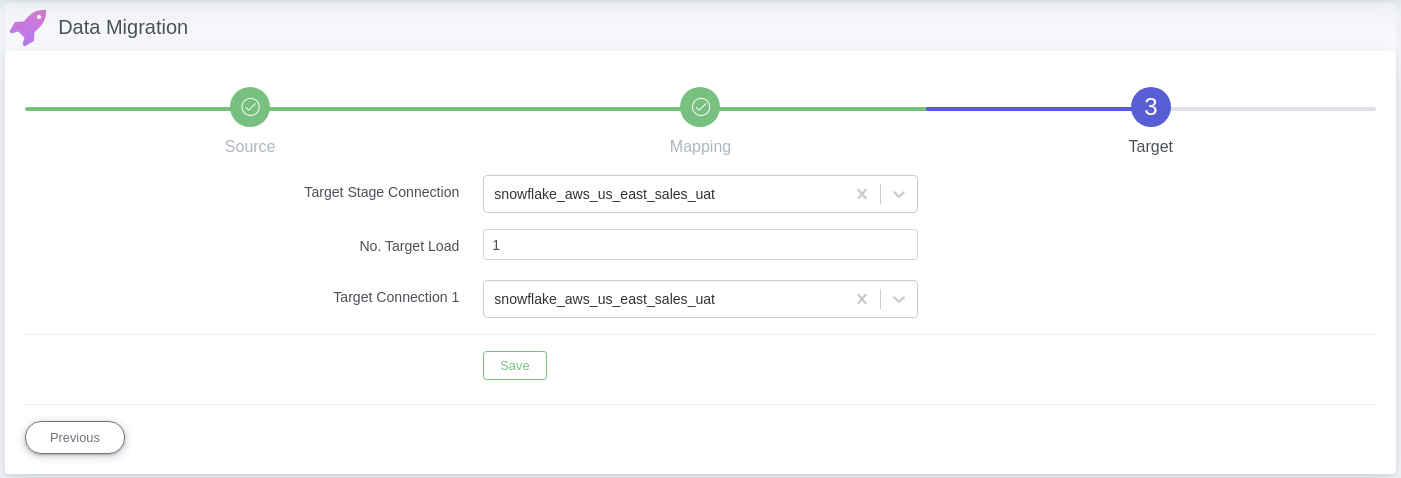
In the third screen, select any snowflake connection name from the drop down menu of the Target Stage Connection, this is the connection where the external stage snowflake tables will be created.
Select the number of connections/targets where the data has to be migrated.
Choose the snowflake connection names (depending on the number of target connections chosen), finally click ‘Save’.
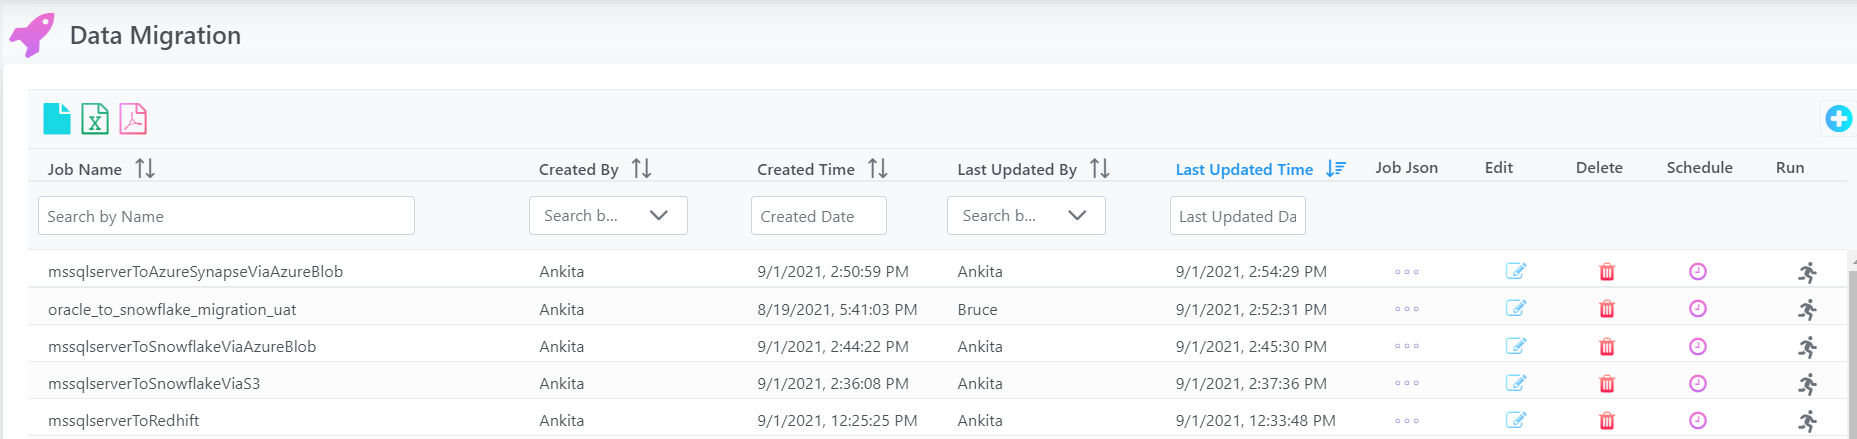
Once the above mentioned Job Configuration is completed, user will be redirected to the data migration home screen, and the latest job configured will be displayed at the top of the data migration jobs list on the screen.
5. Schedule / Ad-hoc Run
After saving the data migration job, user may run job (ad-hoc run) by clicking on the ‘Run’ icon at the right most section of the job definition row.
- After Data Migration Job is configured, click on the ‘Run’ icon at the right most section of the job definition row.
- This will instantiate Job Execution.
- System automatically starts the data migration from Source to Target.
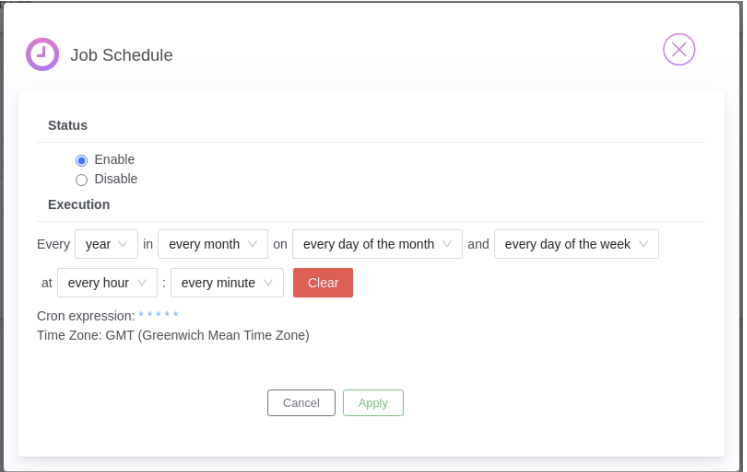
User may also schedule job if required by using Schedule icon/button to schedule existing job.
Monitoring Job
Congratulations! You have created new job for AWS S3 to Snowflake Warehouse Migration.
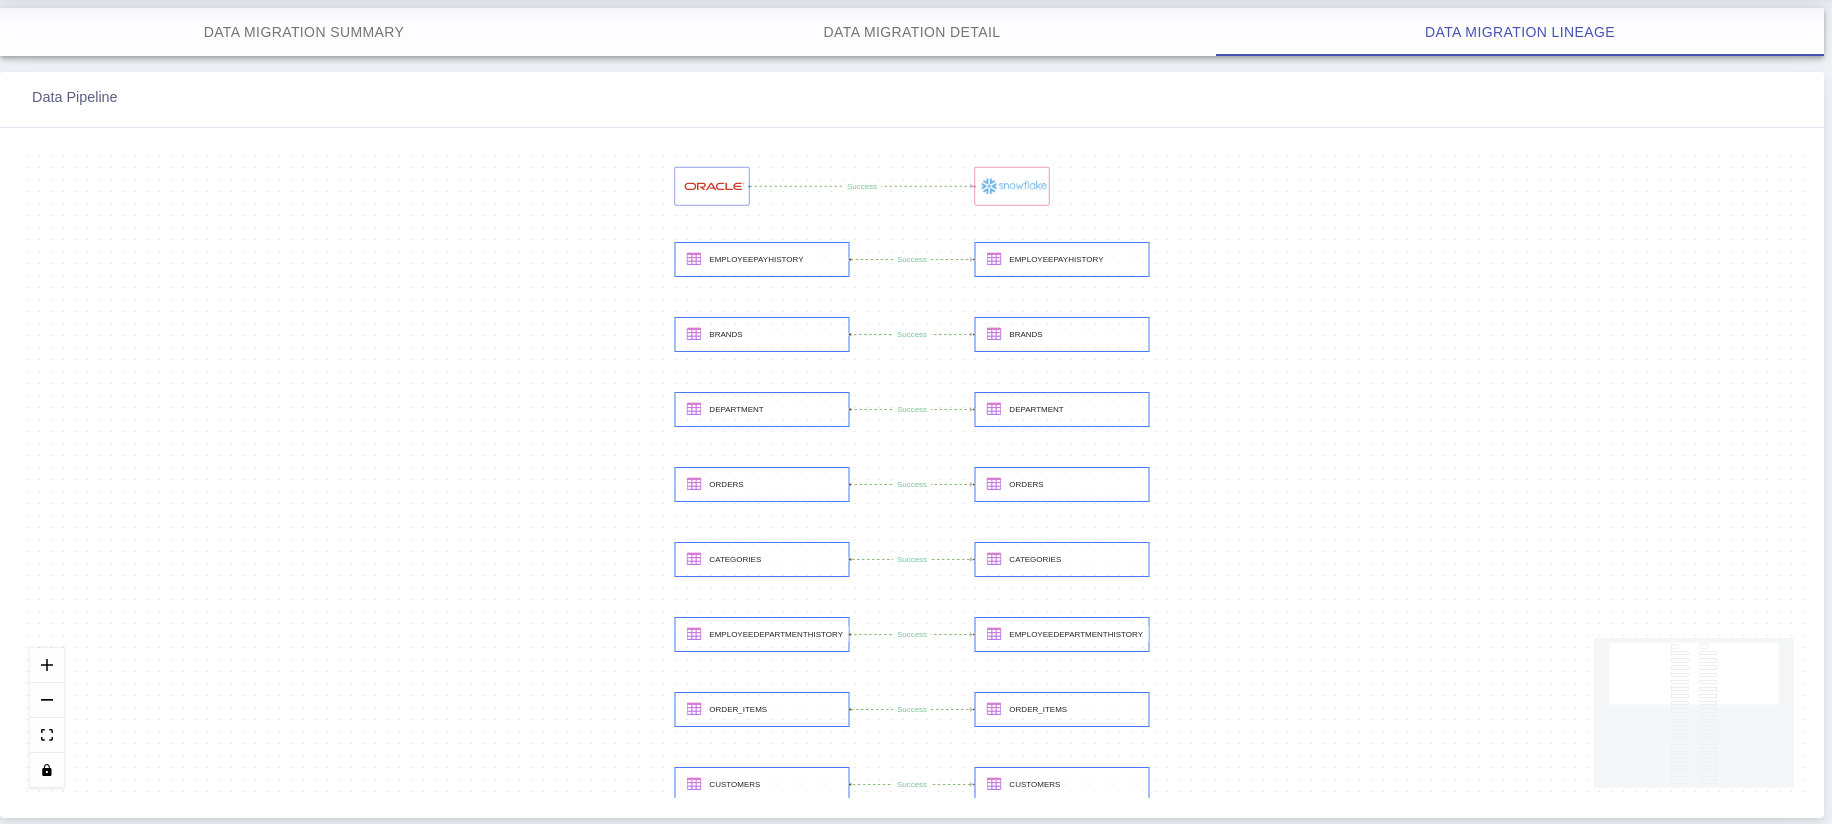
After successful job execution you can able to see job progress and lineage info.
Note: You can able to view job summary stats, table level detail, failed rows details for completed job.
1. Navigate to Job Log
Click Job Log menu from top to check job logs.
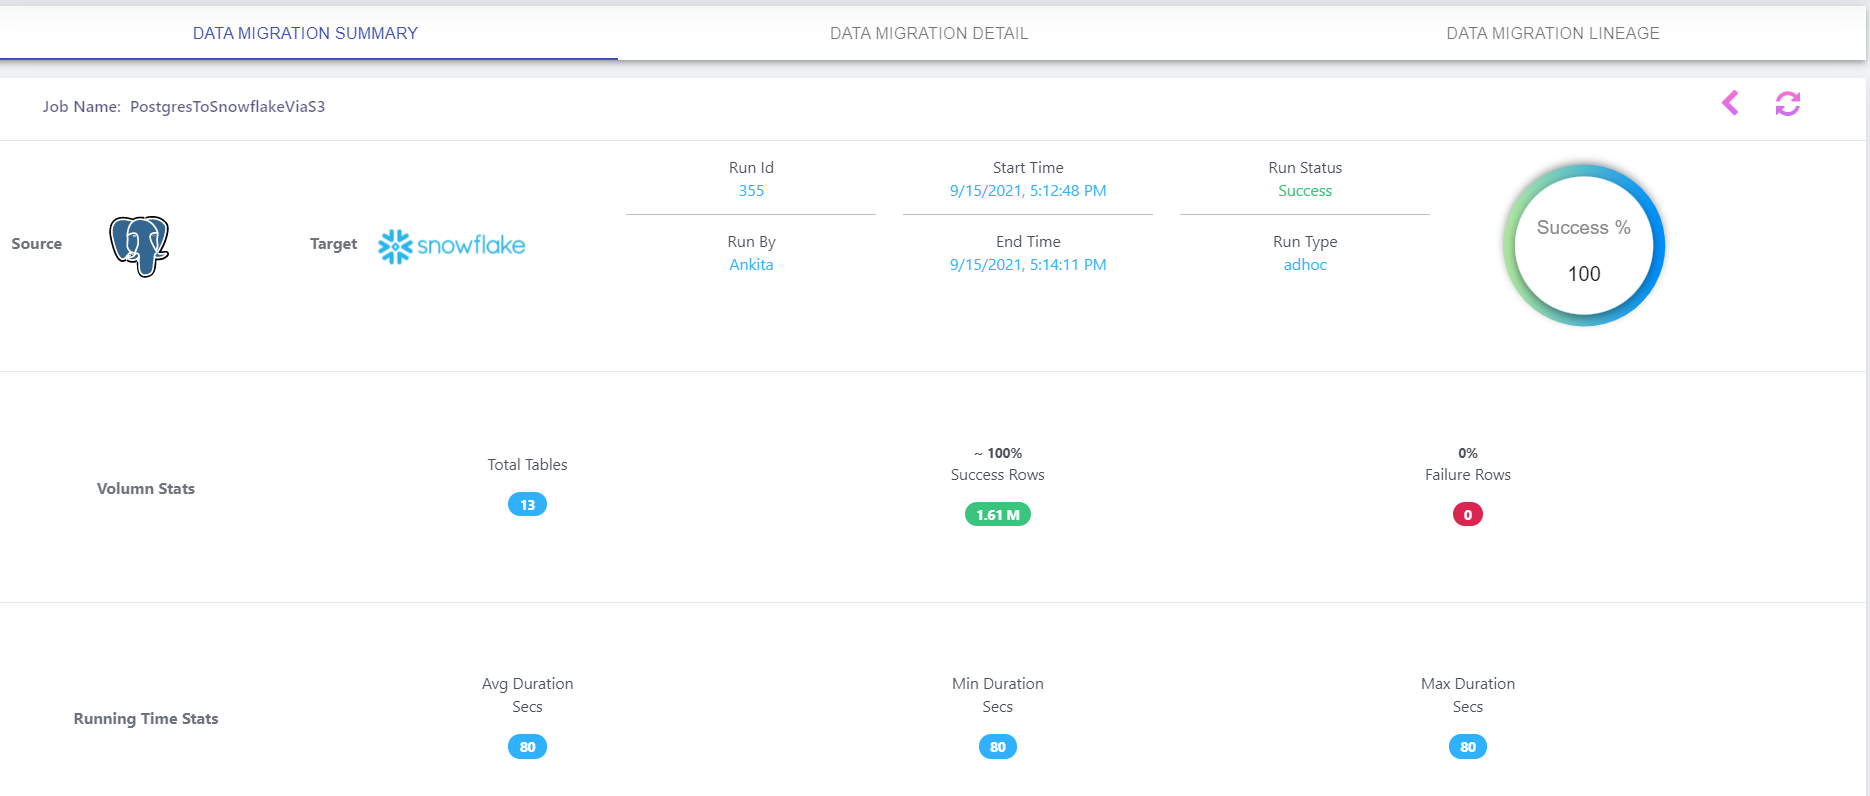
2. Summary Stats
Click on existing Job Status link/button in above screen to view job log dashboard, this will take you to Data Migration Job Log Summary screen
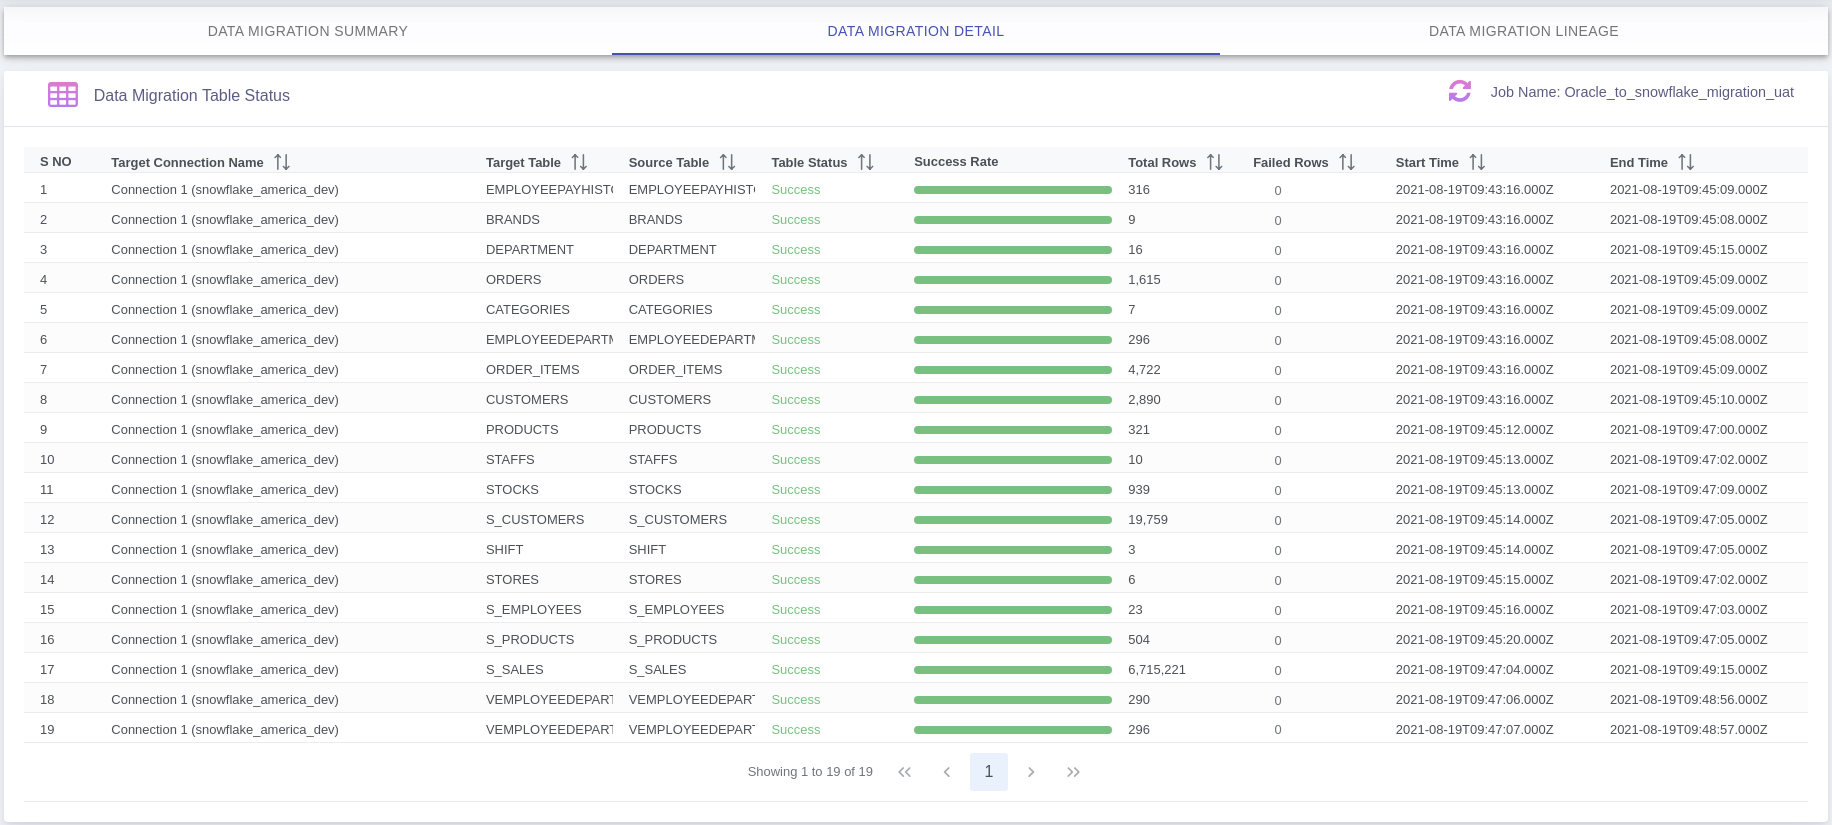
2. Detail Stats
Data Migration Table Level Status: Here you can see failed details rows clicking on Failed Rows count if any.
Questions? Feedback?
Did this article help? If you have questions or feedback, feel free to contact us