JIRA connection creation
uArrow automates issue creation in JIRA based on DQ Job rule execution. You can also be able to create JIRA from DQ Dashboard by manually clicking JIRA button.
Add JIRA Connection
Below are the steps to register JIRA connection with the uArrow Application:
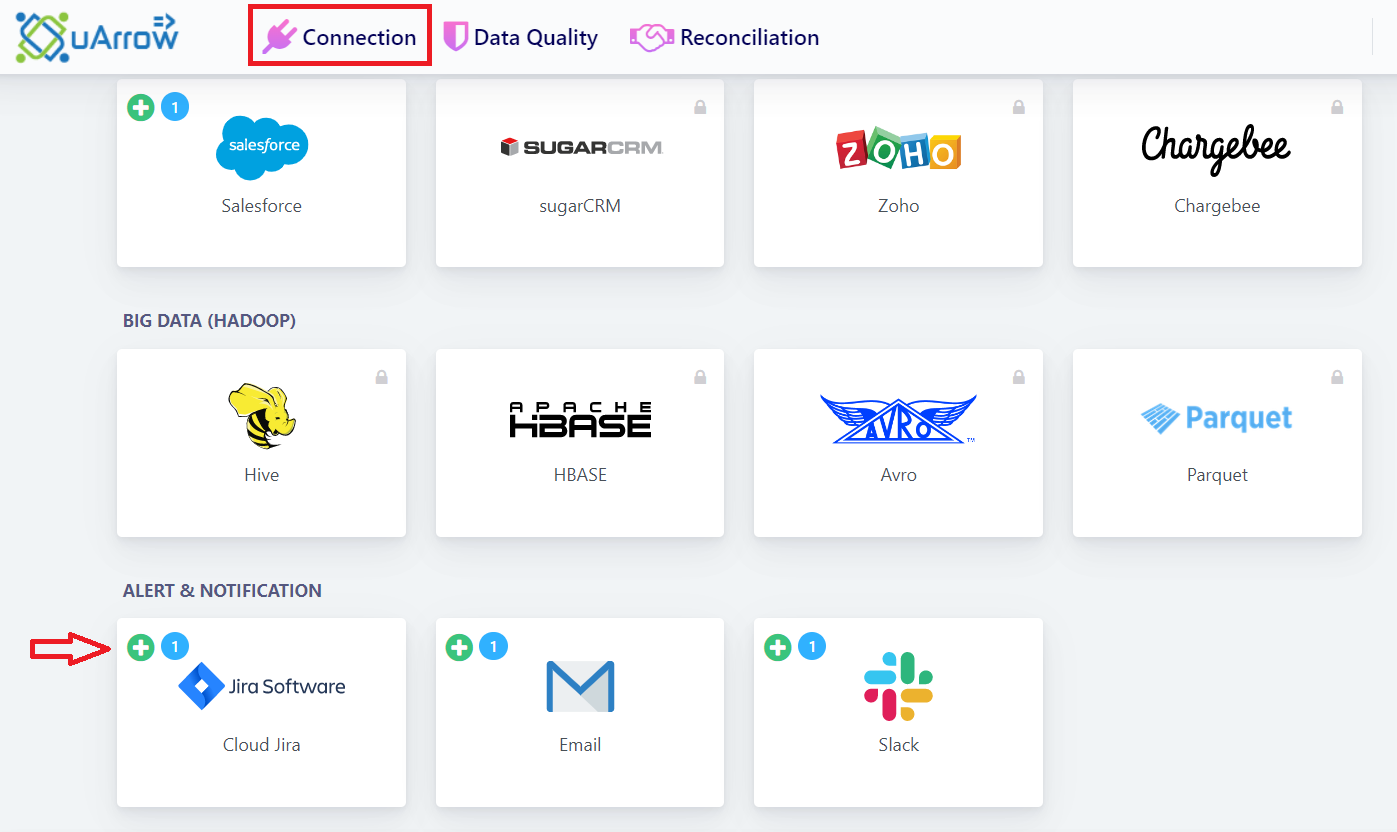
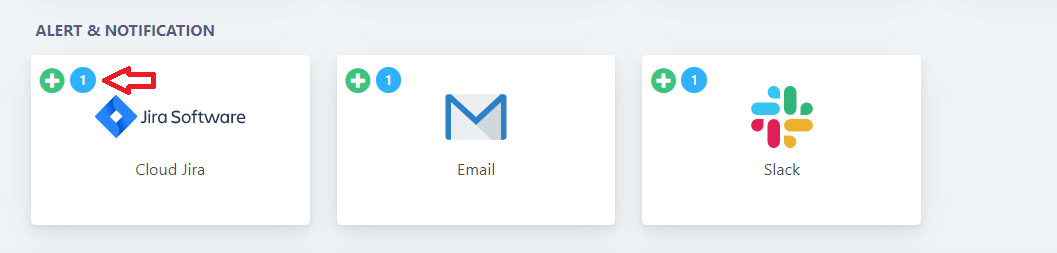
1. Click on Connections menu
2. Click (+) button JIRA Software under “ALERT & NOTIFICATION” section.
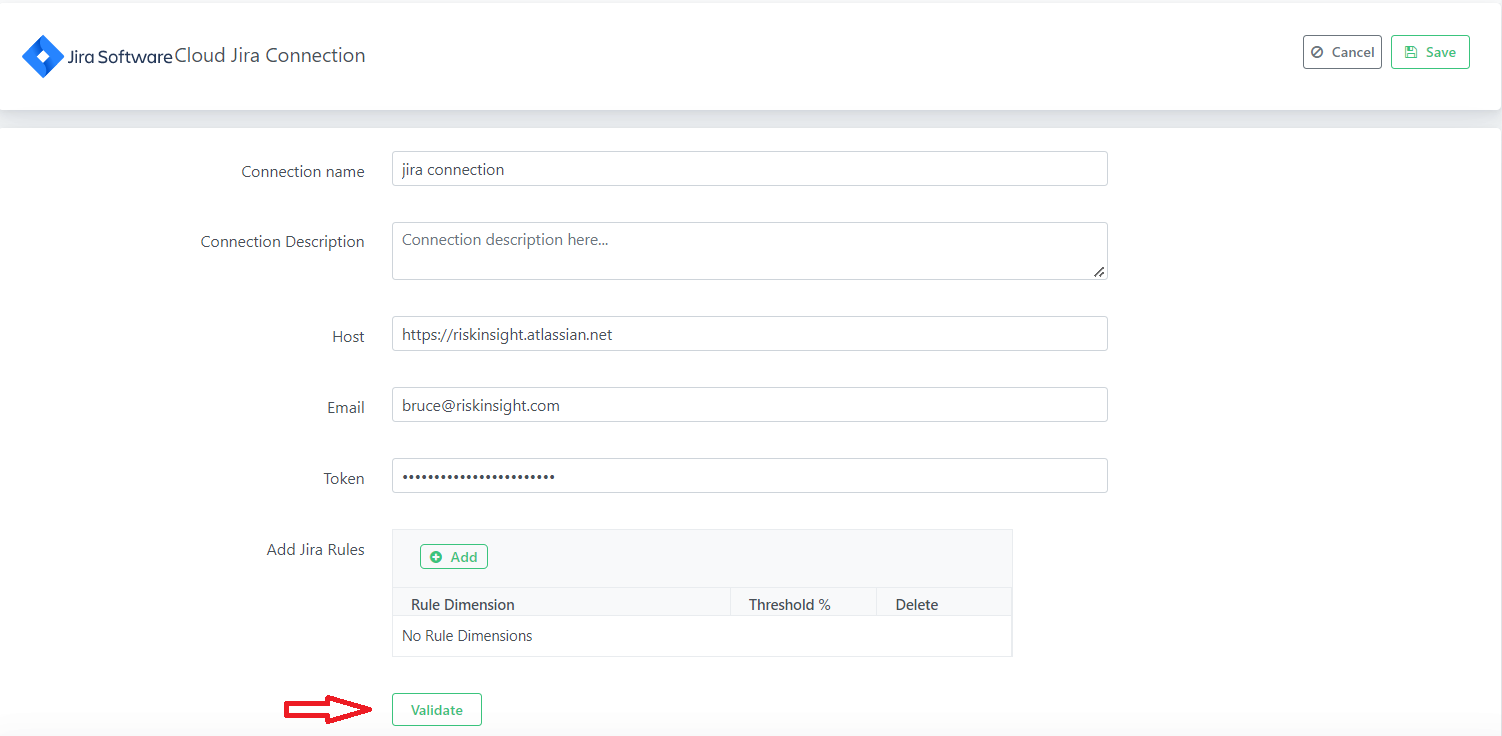
3. Provide the connection details to register in uArrow
| Parameter Name |
Description |
| Connection name |
Specify the name of the source connection. |
| Host |
Enter the name of JIRA instance URL or fully qualified domain name, or IP address. |
| Email |
Enter the email address to connect above JIRA URL instance. Make sure email address has access to retrieve JIRA metadata information like Projects name, Users name, Issue types, Priorities list. |
| Token |
Provide JIRA API token to authenticate JIRA. Refer link to generate JIRA API Token |
4. Verify the connection using “Validate” Button.
5. Finally save the connection
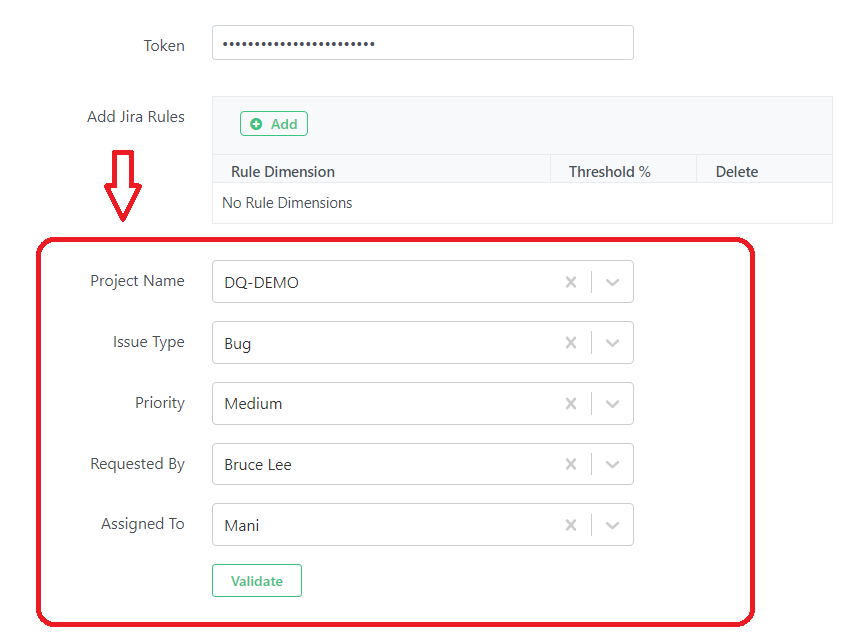
JIRA Project Configurations
After successful connection verification, you can find additional JIRA Project parameters are available to configure (Refer below image).
Configure / Choose relevant details for Project Name, Priority, Issue Type, Assigned To, Requested By like below.
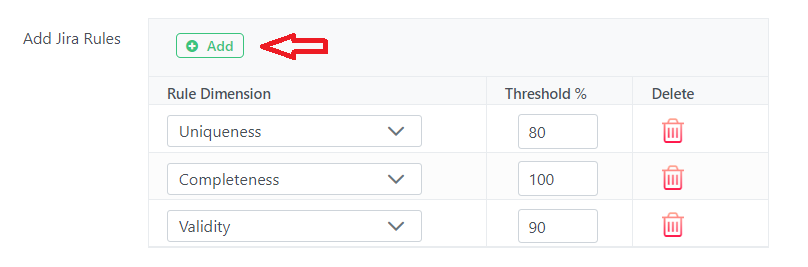
JIRA Rules Configurations
You can define rules by selecting dimension name and threshold % value (0 to 100) to create JIRA issues, this rule will be applied after DQ job execution completed.
Ex. Rule Dimension: Uniqueness, Threshold %: 80
After successful execution of job in uArrow, then uArrow system validates
If any DQ rules defined under dimension for “Uniqueness” and success percentage falls below of 80%, then uArrow creates JIRA automatically for failed rules.
Steps to define JIRA rules
- You can add one or more JIRA rules using add (+) button.
- Choose existing dimension name.
- Input the Threshold % for relevant dimension name.
- Using “Delete” button, you can able to remove existing JIRA rules.
View Existing JIRA Connection
In order to see the list of existing connection and its detail we need to click on JIRA icon (As highlighted in below image).
Once we click on the card we can see the connection created under the JIRA.
You can also able to perform below Actions